


I’m so excited to be here on my lovely cousin’s blog today! I spend most of my time blogging about writing, editing, and creativity, but I also love talking about homemaking. I was thrilled when Nikki asked me to share my homemade bread recipe with you!
I started baking all of my family’s bread after my husband and I took a trip to Italy in 2013. The food was (obviously) amazing! Nothing here at home could compare to the food we had in Europe, but the food that was really lacking was the bread. After a week of complaining about how bad our bread tasted, I decided to start making my own—and I liked it so much that bread-making turned into a hobby! Before long, I was baking homemade focaccia, ciabatta, pita rounds, french bread, and pizza crusts. The bread that started it all was simple, whole-wheat sandwich bread. I bake a loaf every week, and I’m delighted to share the recipe with you!
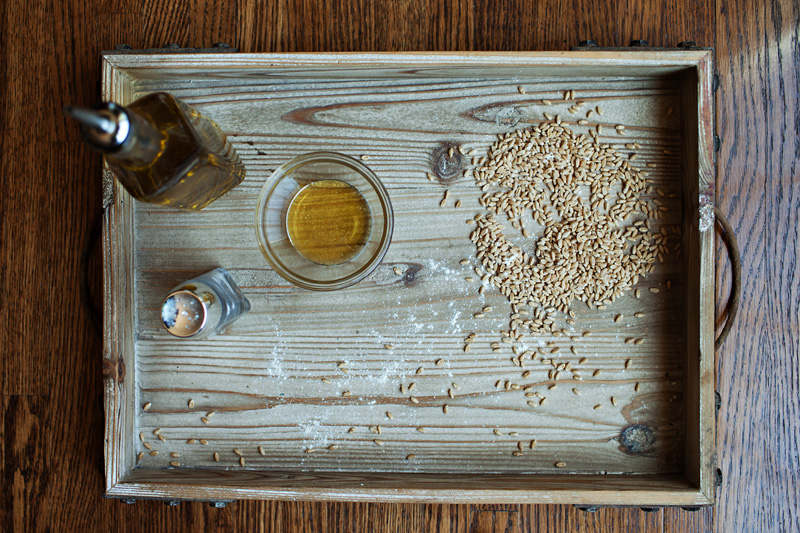 I know it sounds intimidating to bake your own bread, but the beauty of this recipe is its simplicity. You can enjoy your own fresh-baked bread with just six ingredients—and most of them are probably already in your pantry. The base of any bread is flour, yeast, and water. I like to start with fresh wheat berries that I grind myself with our flour mill, but you don’t have to go to those lengths. Just pick up a bag of wheat flour from your local grocery store, or try mixing half wheat and half white flour if you like your bread as fluffy as Wonderbread.
The key to good bread is making your yeast happy. Yeast loves a warm environment, which is why we heat up the water . . . but don’t get it too hot, or the yeast will die and your bread won’t rise! I microwave my water for 45 seconds to get the perfect lukewarm temperature, but every microwave is different. Use a meat or candy thermometer to check the temperature on your water. You want it between 105 and 115 F. Now we’re ready to start mixing!
 Pour your warm water into the bowl of a stand mixer, then sprinkle in the yeast. (You can make the bread without a stand mixer, but get ready for an arm workout!) Add a cup or two of flour, give it all a good stir, and let it proof for 3 to 5 minutes. (It should look a little bit spongy at this point.) Next, add your olive oil, honey, and salt. (Tip: Add the oil first, then use the same measuring cup for your honey. The leftover oil makes the honey slide right out!) I also like to add a sprinkle of vital wheat gluten since it makes whole wheat bread a bit fluffier. (Without the gluten, my bread comes out dense as a brick!) Some recipes call for dough enhancer or citric acid to achieve the same results. If you’re using a mixture of white and wheat flour, you probably don’t need these extra ingredients.
Using the paddle attachment on your stand mixer, stir all the ingredients together and begin gradually adding flour, half a cup at a time. It’s impossible to tell exactly how much flour you’ll need; it depends on your environment and altitude. I use far more flour during humid summers than I do in dry winters! You want your dough to pull away from the bowl but still be slightly tacky (not sticky!) to the touch. Once the dough starts looking more structured, switch to the dough hook attachment. If you’re not using a mixer, sprinkle some flour across a large cutting board or clean countertop. (The extra flour keeps the dough from sticking to the cutting board.)
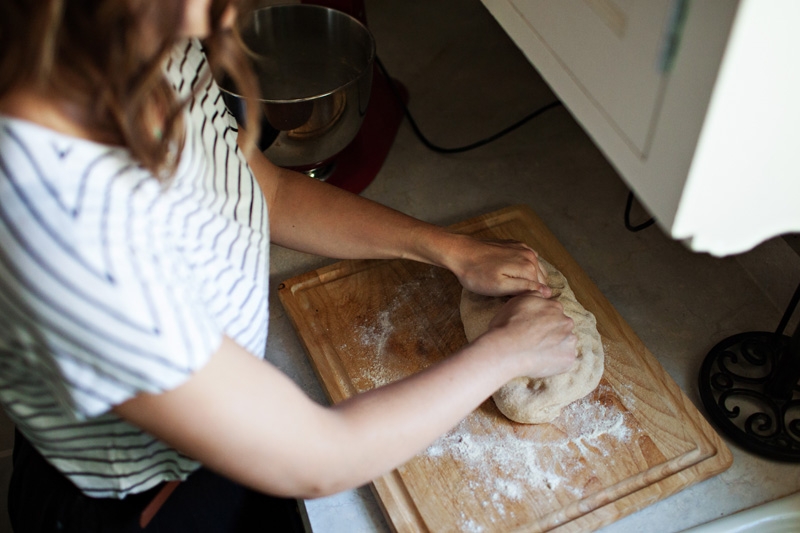 It’s kneading time! Kneading is the process that develops the gluten in the dough. (There’s gluten in white flour, so this step happens even if you didn’t add the vital wheat gluten.) It’s basically a messy science experiment that results in delicious bread! Check out this tutorial to learn how to knead your bread and how to know when it’s ready to rise.
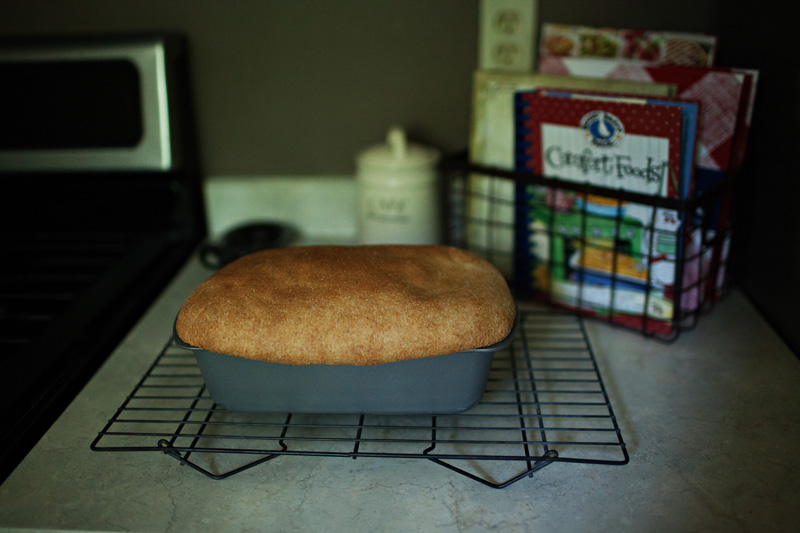
Grease a 9×5-inch loaf pan. (Don’t forget the sides!) Place your kneaded dough in the pan and gently stretch until it fills the space and looks like your standard loaf of bread. Cover the dough with a clean dishtowel and let it rise for about 50 minutes. Remember, yeast likes to be warm! If your dough is too cold, it won’t rise. My favorite spot for rising bread in winter is the warm fireplace mantel. If your kitchen is warm in the summertime, you can let your bread rise right on the counter.  If you have the A/C running like I did, preheat your oven to 170 F. Once it’s heated, turn the oven off and place the dough in the warm oven to rise. Once your bread is risen, you’re ready to bake! (Don’t worry if your bread isn’t risen enough in 50 minutes. Just find a warmer spot and give it more time.) Preheat your oven to 350 F and bake for 30 minutes. You’ll be breathing the delicious scent of homemade bread in no time. :)


[…] It’s had me inspired and thinking up new ideas all week! (I’m also inspired to try her whole wheat sandwich bread recipe, which looks […]
Both of you girls are awesome..Great job Ashley..
Thanks so much, Nana! It was so much fun – next, pasta making!!
[…] I’m over at my cousin Nikki’s blog sharing my homemade whole wheat bread recipe. I thought I’d let you all know about it in case […]
Thanks for letting me take over your blog for the day, lovely! It was fun to get to write about homemaking. The photos turned out great!
Yay! I’m so glad you like them! :) I love having this to show to people – you are just awesome. :)